How to make your own collection of Arbor functions and workflows
When working in Arbor, you will be uploading your own data, and may want to create your own functions and workflows. Everything in Arbor is organized into collections (for example, the phylogeny and base collections). You can create your own collection to store data and workflows. Later I will discuss how you can share any items in your collection with colleagues.
Get started
You will need to open the Arbor web app. For this exercise, you will need to log in; we will post more information about Arbor user accounts later.
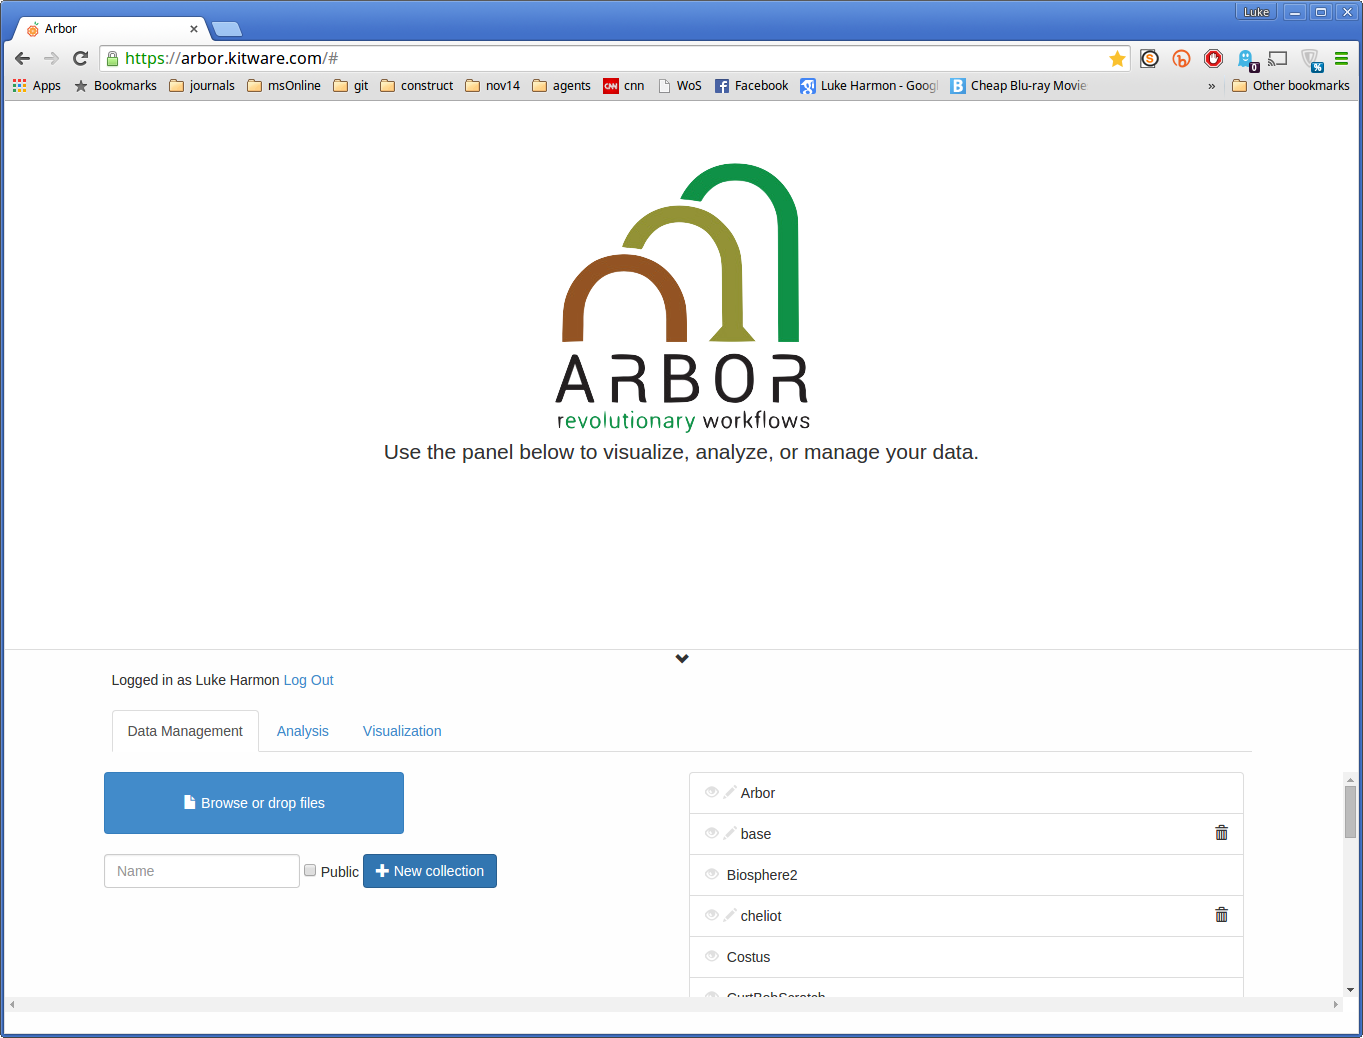
Once you are logged in, your screen should look like this:
You will eventually need the anolis example data files, anolis.phy and anolis.csv, from [Arbor datasets] (/arborCollections/docs_datasets/). Save those files somewhere on your computer.
Create a new collection
On the left side of the screen, just below the “Browse or drop files” box, is the place you will need to focus to create your new collection. In the box there you can type the name of a new collection - let’s use testCollection here, so type that in the box. If you want the collection to be public, you can tick the public box. Otherwise, the collection will be private and only visible to you. Keep this test collection private for this example. Now click the “New collection” button, and your collection will be created.
Immediately after creating my new collection. Did it work?
Scroll down to see more collections, the one you just created will be at the bottom. Click on both the “eye” and the “pencil” next to your collection. The “eye” lets you see the things in your collection, and the pencil gives write access so that you can add things to the collection (and delete!).
Saving data to your new collection
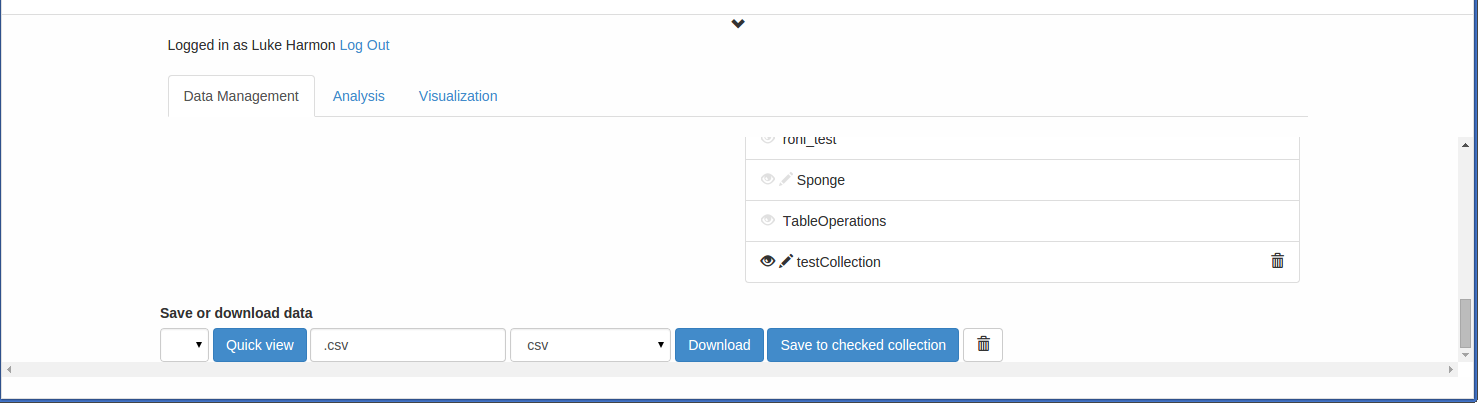
Once you have created your collection, you can add data to it. Drag the “anolis.csv” file to the “Browse or drop files” box to load it into your browser. You can now save this file to your new collection. To do that, scroll down to the very bottom of the bottom browser frame, where you should see “Save or download data.” “anolis.csv” should show up there.

As long as the pencil next to your new collection is highlighted, you can now click “Save to checked collection” to save this data file to the new collection. Try that now. The name of the collection should show up next to the datafile:

Creating new analyses and workflows in your new collection
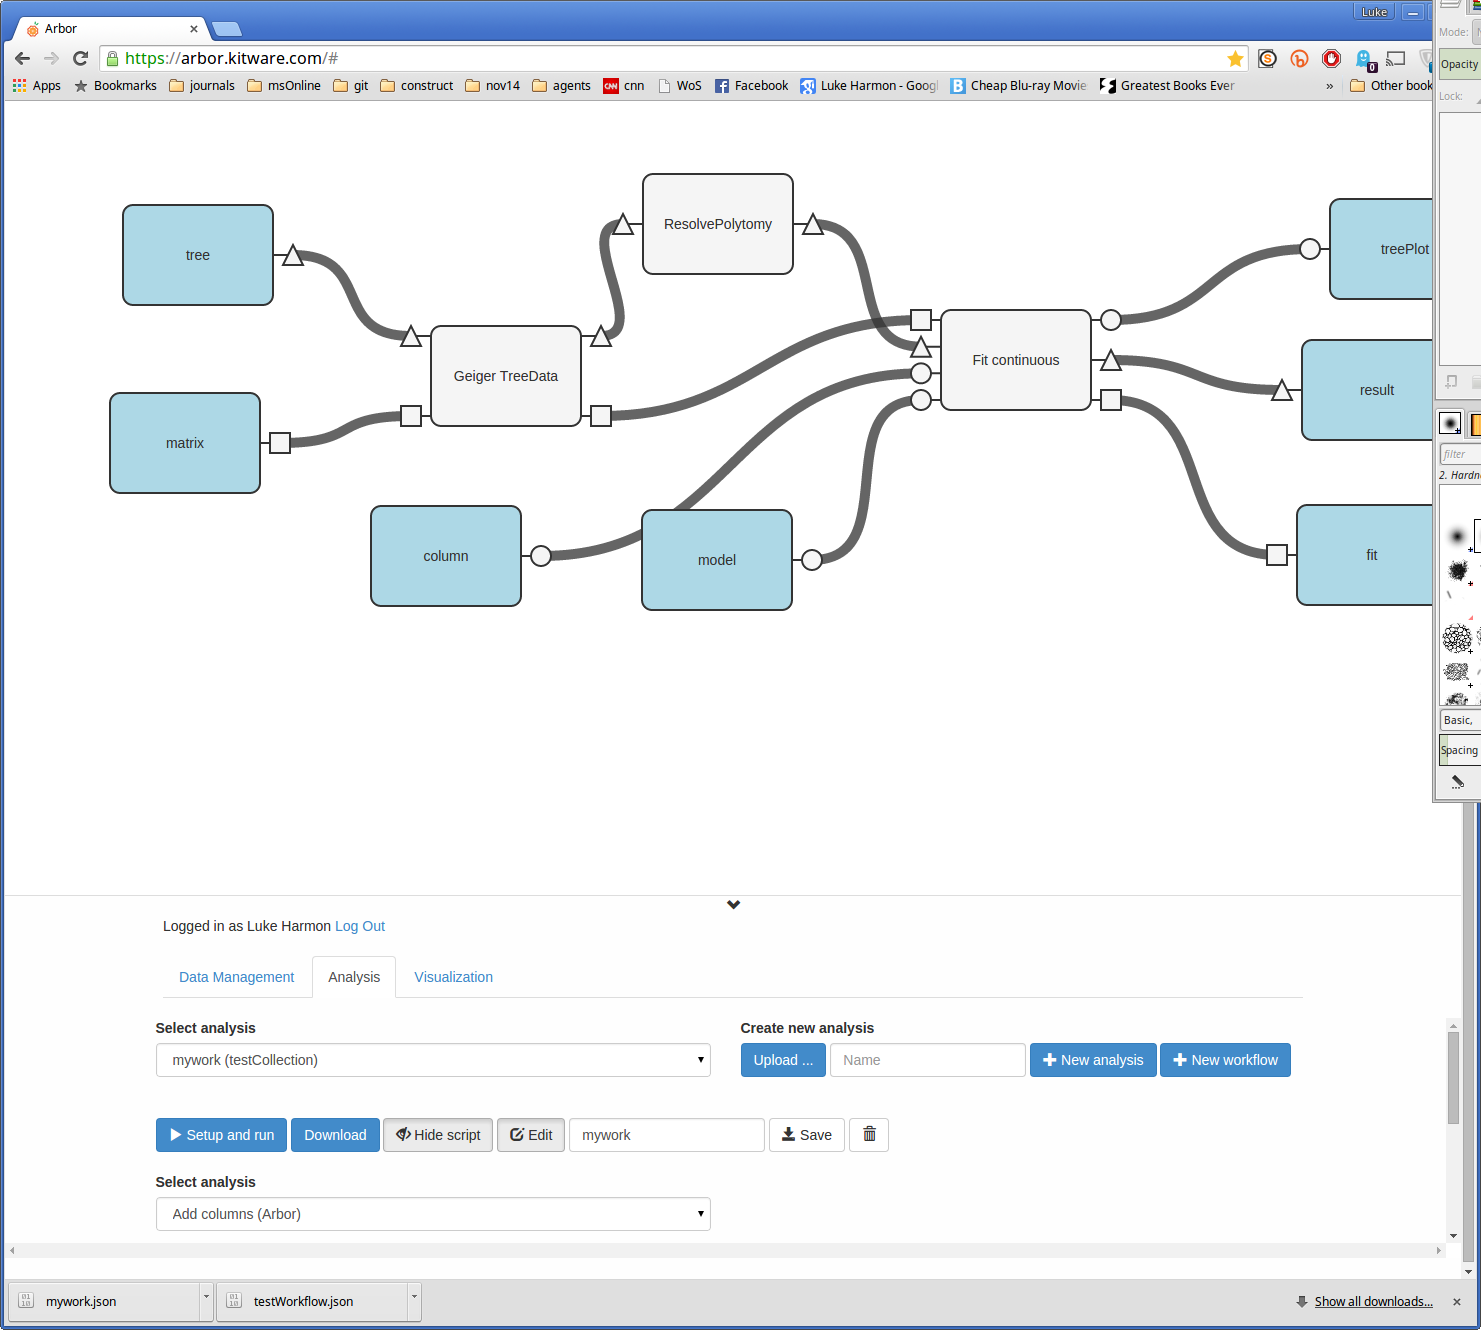
Now, move over to the “Analysis” tab. You can create new analyses and workflows in your new collection by clicking on “+ New analysis” or “+ New workflow.” Since those will both be covered in other tutorial pages, I will show you how to load in a workflow file that has been downloaded in JSON format. Imagine, for example, that a colleague emailed you an arbor workflow called mywork.json. You can download such a file here. Now, to load that workflow into your new collection, click on “Upload… “ and find the mywork.json file. The new workflow is now in your collection!
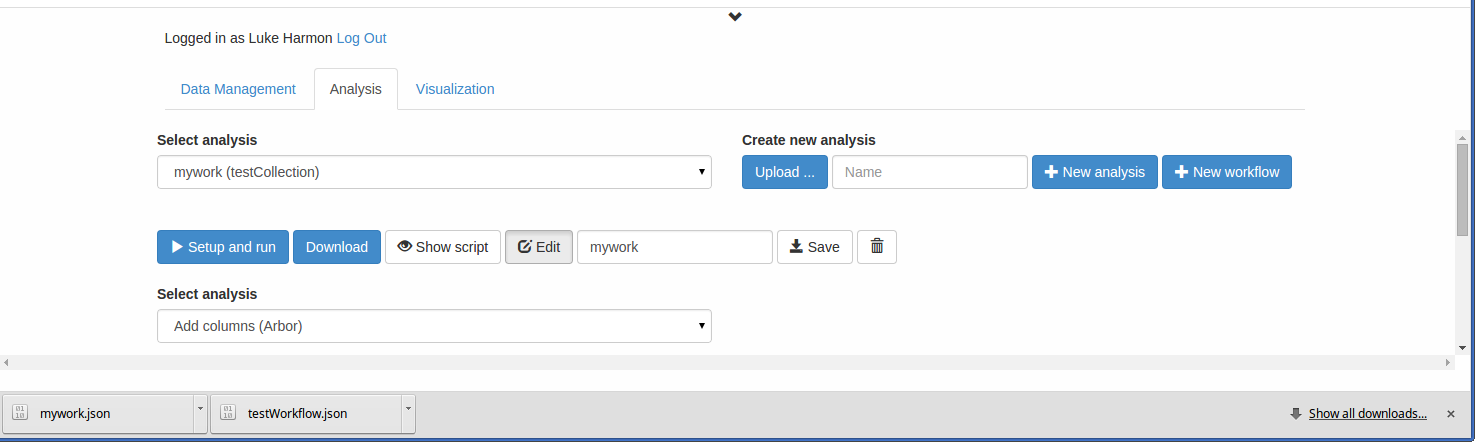
You can see the new workflow by clicking “Show script.”
You can even edit this workflow using the “Edit” button (keep in mind that you have to hit “Save” for the changes to go into effect).